Track DSP settings
Track DSPs (Digital Signal Processors) and their settings are effects ("DSPs) that can be applied
to a track. There are plenty of those, and their usage requires a bit of experience.
We will try to point out the most common usage for each individual effect to present you what
you can do with the effects.
 The Track DSP settings menu
Screen displays (from top-left to bottom right)
Effect window buttons
Using Track DSPs settingsTo add effects to a track, first go to the track you wish to put the effect in. The effect list changes as you move along the tracks. Now select an effect from the "Available" list and double click on it. The effect window appears. Now you can modify its effect parameters or add new effects. You can also automate effects using Track Automation or Pattern Effect commands. This way you can change effect parameters during playback. After you've put some effects on the track, play a sample on it and hear the result. If it is not OK, modify the effect parameters until it sounds as you intended. Effects are easy to add and work with, but to master them you will need to experiment and hear some examples. Look for examples in the Tutorials. Although Renoise effects are very fast, they can still take a lot of CPU power so take care how much you put in. The Effects in detailTrack settings are always present. Use them to modify basic track parameters.
GainerThis is a very simple effect but it can be of great use for proper sound volume balancing. Use the gainer to amplify the volume of your track or to change the panning. The volume and panning values are added to track settings volume and panning.
DC OffsetIn a normal waveform, there are 2 maximums (positive, negative) and the center (zero). On waves with DC offset in it, this center line is not at Digital Zero but slightly moved into the positive or negative range. This results in reduced dynamics. The DC Offset effect brings the center line "back to the zero line". Also see "DC Offset" in the Glossary section. This effect can also be used to prevent bad samples with DC offset from clicking at the end. It can also, of course, intentionally be used to create this clicking effect if desired.
GateA Noise Gate is a special type of expander that can be used to reduce or eliminate noise below a threshold level. A gate is a similar device but generally is not used for noise elimination. It is usually used to increase or reduce the sensitivity of particular beat levels, i.e. if you use a drum loop you can use it to eliminate certain parts of the loop (that have a lower volume) or to make variations to loop grooves. Basically, if the audio signal is less than threshold, it turns the volume down, but not the signal itself is used. Instead, it uses an envelope follower. To control this envelope follower use attack, release and hold the parameters of the gate device.
ShaperOne of the most strongest production tools widely used today is the Shaper, a type of compressor/limiter. Shaper "squeezes" the sound by increasing the volume of the quiet and decreasing the volume of the loud parts. The settings set the rules for this process. The result is a more balanced volume amplitude but also a reduced dynamic range. When such compressed sound is amplified, the result is sound that sounds much, much louder than original sound. When you listen to today's CDs you will notice that they sound very loud compared to those published many years ago. This is the case because basically compressors are used in almost all pop music productions nowadays. A compressor/limiter can be useful as an effect in the Master track to make the overall sound louder. A compressor can be very useful to get vocals to a certain amount of equal volume that you will need to work with it. Usually, if you don't have a good singer who knows about this problem, recorded vocals have too big volume differences to work with them properly. Especially for putting vocoder effects on vocals, you need them to be as dense (compressed) as possible. In all these cases be aware that you shouldn't exaggerate the usage of compressors! It will only result in a big mess of sound lacking dynamics, and overuse of a compressor usually has the effect of "Pumping", too. A limiter on the other hand limits maximum volume amplitude to a certain value. It is used in radio stations to limit the maximum signal to avoid distortion and also in clubs to reduce the risk of burning the speakers with high amplitudes of the sound.
Lo-Fi MatIt may happen to you that a certain sounds sounds too good. With the Lo-Fi Mat, you can decrease its quality and add noise. This can sound very effective on some drum sounds, voices, or as an additional effect along with distortion. Some people might recognize this effect as the "Mr. Oizo effect".
DistortionThis effect decreases the sample quality but gives it a "stronger" sound. There are two distortion types: Amp and Fuzz. Amp distorts the sound by over amplifying it. Fuzz thresholds and over-amplifies the sound to produce distortion. Distortion is used mostly on guitars and 303 sounds, but also on leads, bassdrums etc.. You've heard distorted guitars gazilliun times. This is it. If you feel like listening to a distorted 303 lead, have a look at the Tutorials to get the idea of how it can sound.
FilterThis is one that Techno and Trance freaks simply love (and not only them). Use this effect on 303 baselines, basses, strings, or even on vocals! Various values for cutoff frequencies can specially enrich your sound. Look at the Tutorials to learn how filtered strings can sound. Try it with Moog filter, the Lowpass, the Highpass or the other filers!
Filter types (buttons) Choose the filter type by first selecting the main filter type with the arrow buttons, then click on the button that represents the sub-filter type.
EQ5 / EQ10An equalizer is a series of band-pass filters you can make certain frequency bands louder or more quiet with. It is used for extracting vocals, removing basses or high tones, changing characteristic a sound etc.. Here, you can select a 5-band or 10-band equalizer that only differ in the number of frequency sliders (EQ10 has 10 of them and therefore better control, but in many cases EQ5 which is simpler for controlling and will use less CPU power).
FlangerFlanging has a very characteristic sound that many people refer to as a "whooshing" sound or a sound similar to the sound of a jet plane passing by. This effect takes the original sound, copies it and shifts one copy's start offset by a very small amount, e.g. 2-3 ms. After that it modifies this shift with a period value (like LFO). Both sounds together result in the "flanging" effect. Use a Flanger on strings, 808 snare drums and virtually all lead sounds. This will give a certain coloring to almost any sound.
PhaserPhaser or phase shifter is a special kind of a flanger filtering the original sound before delaying it.
StereoExpanderThis device lets you reduce a stereo signal to mono or expand the stereo width of incoming signals.
Delay (Echo)This effect is used so commonly that you cannot imagine one song without this effect. It simply repeats (echoes) the original sound. It will sound very weird if it is not synced with the song speed and song beats, so use the x1, x2, x3, x4 buttons to automatically match the delay to the appropriate number of pattern lines.
ReverbReverb is series of echoes, like hundreds and thousands of them. It occurs in large halls, corridors, canyons, open spaces that are between walls or mountains, churches or any other acoustic chambers. Usually echoes of an original sound reach your ear very fast you can hardly distinguish a particular echo among all of them. What you hear is a "collection of echoes of an original sound" that is called "Reverb". The sound can be also partially "damped" by room walls cutting off certain frequencies out of original sound. All of these parameters can be controlled with this Reverb effect.
Using reverb and echo effects on vocals and leadsLet me share with you a little secret everyone knows. You may wonder why is it a secret then? Well, if you know it but don't notice it is almost like not knowing it. Here it goes: All of the lead instruments and lead vocals must have added reverb and/or echoes. Only a few very special examples are excluded from this rule. Why is this so important? First, if you ever entered any studio and heard "sound of silence" that is best to describe the acoustic chamber that is acoustically isolated from the outside world noise, you will begin to notice that virtually everything we hear has at least little echo or reverb added to it in normal life. You don't have to be in a large hall or canyon - even the room you are sitting in has a little room reverb: try clapping your hands to hear it. That is why reverbed or echoed leads or vocals sound more natural to the human ear. Next, if you use lead or vocal without this time-based effects it may sound very, very raw and flat. Once you add an reverb on it, it will sound fuller and much wider. It works like magic - adds stereo to mono sounds, fattens thin sounds - but beware, this can be also a trap! Adding too much reverb will cover all of the other sounds. It is great if you have only a few instruments in your mix, but if you have loads of them, be cool, lower that reverb or nothing else will go out except it. And hearing only one sound going out and covering the rest of sounds can be incredibly stressing to your ears! Oh, and by the way, don't add reverb to bass sounds! These take so much acoustic space that they already are fat and wide. However, sometimes even reverbed basses sound good, not often though, so watch out and rather leave reverb out of those sounds. VST effectsThe parameters of VST plugins you use differ from plugin to plugin. Some effects have also an own editor window that can be opened by clicking on the "Open Editor" button. There are many VST effects available, describing them all here is impossible. You can use VST effects equally as internal DSP effects and mix them all together in any amount you like. 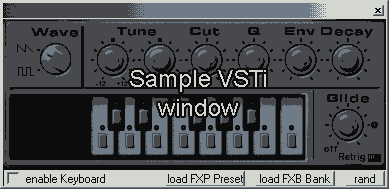 A sample of how a VST plugin might look like
Non DSP DevicesAll DSP Devices in the "Available" list of the Track DSP section with an asterisk on their left side are non DSP Devices. This means that they don't process audio streams themselves. You insert them like normal DSP effects, but they will have no effect on sampled audio but have other functions that we'll explain now. LFO DeviceThis device gives you automatic control over any parameter of another device by using an LFO. LFO parameters are set in LFO Device and then applied to the destination device that can be any other device including a VST automation device or even another LFO Device!
MIDI CC DeviceThis is a helper device that lets you send, record, and automate Controller Changes (CC) of MIDI or VST instruments. In the effect box, you'll see the VST Instrument that is steered by it.
When a MIDI instrument is chosen, it uses its device/channel and delay settings. When a VSTi instrument is chosen the CC's will be sent to this VST instrument. Usually all parameters of a VSTi can be controlled via CC messages. Please read the documentation that comes with the VSTi to find out which parameters can be controlled and which controller number you have to use. For each of the 4 rows:
Search for "MIDI specification controller" to get a listing of "default" controller numbers. VSTi Automate DeviceThis device is used to translate VSTi parameters into effect sliders which you can later control using Track Automation - therefore effectively controlling the VSTi device. It can control many different VSTi parameters. Mapping of controllers can also be user specified (the controller number doesn't have to be numerically identical to VSTi parameter).
Send DeviceSend tracks are already explained in the Quickstart section, so if you have no idea what Send tracks are, please read that paragraph.
|
 |
| Renoise manual version 1.0a | http://www.renoise.com |
